 |
| The Joshi Kitchen Garden |
Folks living in southern United States or in warmer countries, don't have to worry about germinating seeds indoors. But up here in the North, I have no choice but to grow seedlings indoor if I were to expect produce in a reasonable time. If I were to wait for the right temperature to grow seeds outdoors, it will be the tail end of July before I would be able to get any produce at all. So, I typically start growing seeds indoors in the month of March and often start harvesting vegetables by early June. This year was no exception - I started my seeds indoor in mid March.
Over the years I have tried various methods of seed germination, planting in seed starter trays, using warming pad, placing them in sun, placing them in plastic tubs to maintain humidity, and placing the tubs in the sun etc etc. But I was having mixed success. I would get about half the seeds to germinate and some to not germinate at all! So last year I decided to try something new.
In Indian homes, we germinate moth bean (turkish gram, Vigna aconitifolia) by soaking them in water for a day, and then loosely tying them up in a kitchen towel for a few days. The humidity in the pack is sufficient to keep the moth gram moist and germination is seen within 48-72 hours. Taking a lesson from that experience, I said why not try that method for germinating all seeds.
But moth gram is a fairly large seed, about twice the size of a grain of rice, and vegetable seeds can be tiny - often smaller than a speck of sand. And the quantity one is trying to germinate is usually very very small - perhaps no more than just a few seeds. So germinating them in a kitchen towel is impossible and I had to come up with a different system ... germinating seeds on a wet paper towel, placed in a ziploc bag. Wet paper towel acts as a medium and the ziploc bag ensures that the seeds don't just dry out.
Here is a step by step method for germinating seeds in paper towels:
Step 1. Buy the smallest ziploc bags you can find, from the store - I had some that are 3 inch x 4.5 inches, which are perfect for this kind of activity. (I purchased them from ULine catalog)
Step 2: Cut paper towels into small strips such that they will fit in the ziploc bags folded once over. In my case, I cut them about 4 inch x 5 inch such that I would fold them over length wise to give me a 4 x 2.5 inch folded paper towel
Step 3. Spray a little water to wet the unfolded paper towel. Mind you, the paper towel piece should not be soaking wet or dripping - otherwise your seeds may rot. If you want, you may add a few drops of hydrogen peroxide to the water to prevent fungal growth.
Step 4. Sprinkle the seeds on one side of the fold line, and fold the paper towel over to cover them.
 |
| Eggplant seeds ensconced in their kitchen towel bed. |
Step 5. Gently place the moist paper towel with the seeds into the ziploc bag and close it, leaving some air in it so that there is a little room for the seedlings when they germinate. Don't forget to label them :-) otherwise you will soon be wondering which seeds are which.
Step 6. Place the ziploc bag(s) in a small tupperware container and place it in a warm area. I place mine next to an aging iMac whose fan emanates heat waves like the winds of Sahara! Monitor the bags every few days to see if germination has occurred.
Often I find that the largest seeds germinate the fastest. Cucumber, beans, okra, etc, will germinate within a week, but smaller seeds like tomato and pepper take a bit longer. In my experience, smallest seeds such as basil and rosemary have take the longest, but there is not hard and fast rule. Just last week, I had a couple of basil seeds germinate within a few days where as the cucumber seeds were yet to sprout.
 |
| A turnip seedling |
Step 7. Once the seeds have germinated and appear strong enough, it's time to transfer them to pots. I find it easiest to break up the paper towel to separate the seedlings, taking care that the roots aren't destroyed. Gently place the seedling, with the piece of paper towel stuck to the root, into the pot, cover the roots with soil and water sufficiently to moisten all the soil around the seedling.
 |
| In transplanting the cucumber seedlings, I tore the paper with roots so that roots were not destroyed. |
 |
| I use both degradable pots and plastic pots, with a mix of peat moss and perlite as growing medium. |
 |
| Here are recently transplanted seedlings labeled with their hindi names. Karela is Bitter Gourd and Bhindi is Okra. |
 |
| My turnip seedlings standing tall! |
Step 8. Place the seedlings into a large plastic storage bin with sufficient head room, and place it in a warm area. This step is only necessary if the temperatures outside are below 70° F. If it's warm enough outside, place the pots in a partially sunny location ensuring that they don't dry out.
 |
| Here are some tomato seedlings. I have had good success raising Tomato seedlings indoor. |
 |
| Just look at the gorgeous seedlings of bitter gourd (Karela) a few weeks after transplantation! |
 |
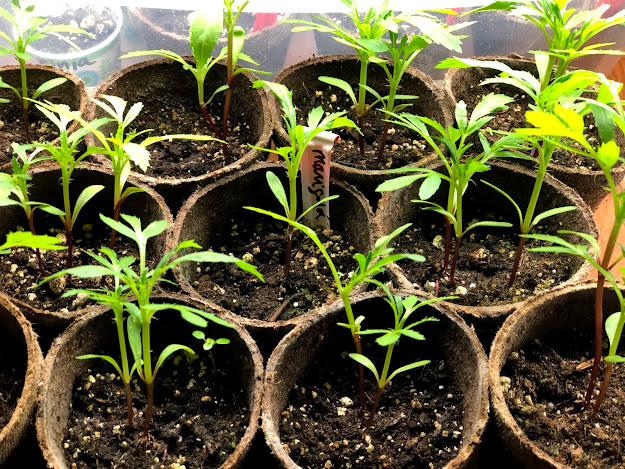
| Here are some Marigold seedlings. I used the same method for flower seedlings too. |
Step 9. When the seedlings are strong enough (about 2-3 inches tall) and the soil is warm enough, it is time to transfer them to the kitchen garden.
If you are growing seedlings inside, it is important to harden them before you plant them in the soil. This year, my dear cousin and friend Dev gave me a plastic greenhouse as a Christmas gift, and that came in very handy to harden the seedlings.
 |
| Portable green house, a gift of Shubhra and Dev Pareek |
 |
| Sorry for the mess - just wanted to show how I used the portable green house for seed hardening. |
By this method, I have almost 90-95% seedling success rate, where was directly planting in the pot my success rate was no better than 50%. Although this is a good method and it works for me, it may not work for some one who has a much larger kitchen garden than mine (30' x 30'), because it is a lot of work to germinate seeds in paper towel and transfer them to the pots.
And this is what my kitchen garden looks like, six weeks after the seedlings have been transplanted into it.
 |
| The Joshi garden towards the end of June 2020 |
 |
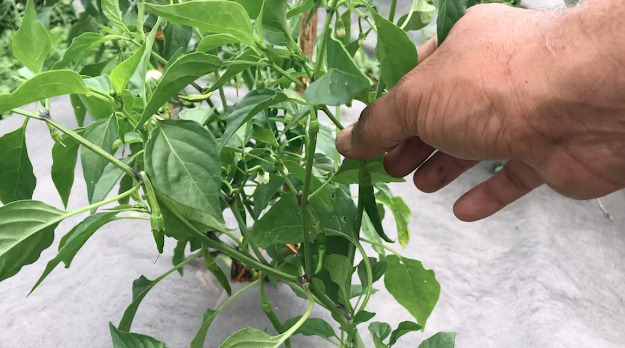
| I already have a few peppers! How exciting! |
 |
| Parsnip root (Mooli, in hindi) |
 |
| Long green gourd (Doodhi) grows very nicely in New Jersey. Here are two vines grown from seeds germinated indoors. |
Gardening is such an adventure and more enjoyable if you start from seeds and watch little plants emerge from these tiny little specs carrying all the genetic code. But most people find it frustrating to germinate seeds, and just run to the local Home Depot to buy potted plants. There is nothing wrong with that. But should you choose to germinate seeds indoors, my method might be a way to reduce some frustration.
Do let me know if you try this in your home. I would be interested in knowing your success with the method.
Good luck gardening!!


Comments